How to measure the power consumption of a microcontroller with the Nordic Power Profiler Kit II
When measuring currents, you normally immediately think of a multimeter. In many cases, this is completely sufficient, regardless of whether we are talking about many amperes or a few microamperes. With microcontrollers, however, things are a little more difficult, as I found out when measuring the current consumption of the weather station sensors.
The limitations of a multimeter
So what exactly is the problem with a multimeter? First of all, the multimeter can only provide the current value of the power consumption. It is not possible to determine the average consumption over a certain period of time. However, this is particularly important if you want to know how energy-efficient the hardware and software are.
Another problem is the fact that the power consumption of a microcontroller can fluctuate extremely. From a few hundred milliamperes when the built-in components are used intensively to a few microamperes in deep sleep mode. To understand the problem, you need to know the internal structure of a multimeter. Normally, this setup would be used for measurement:
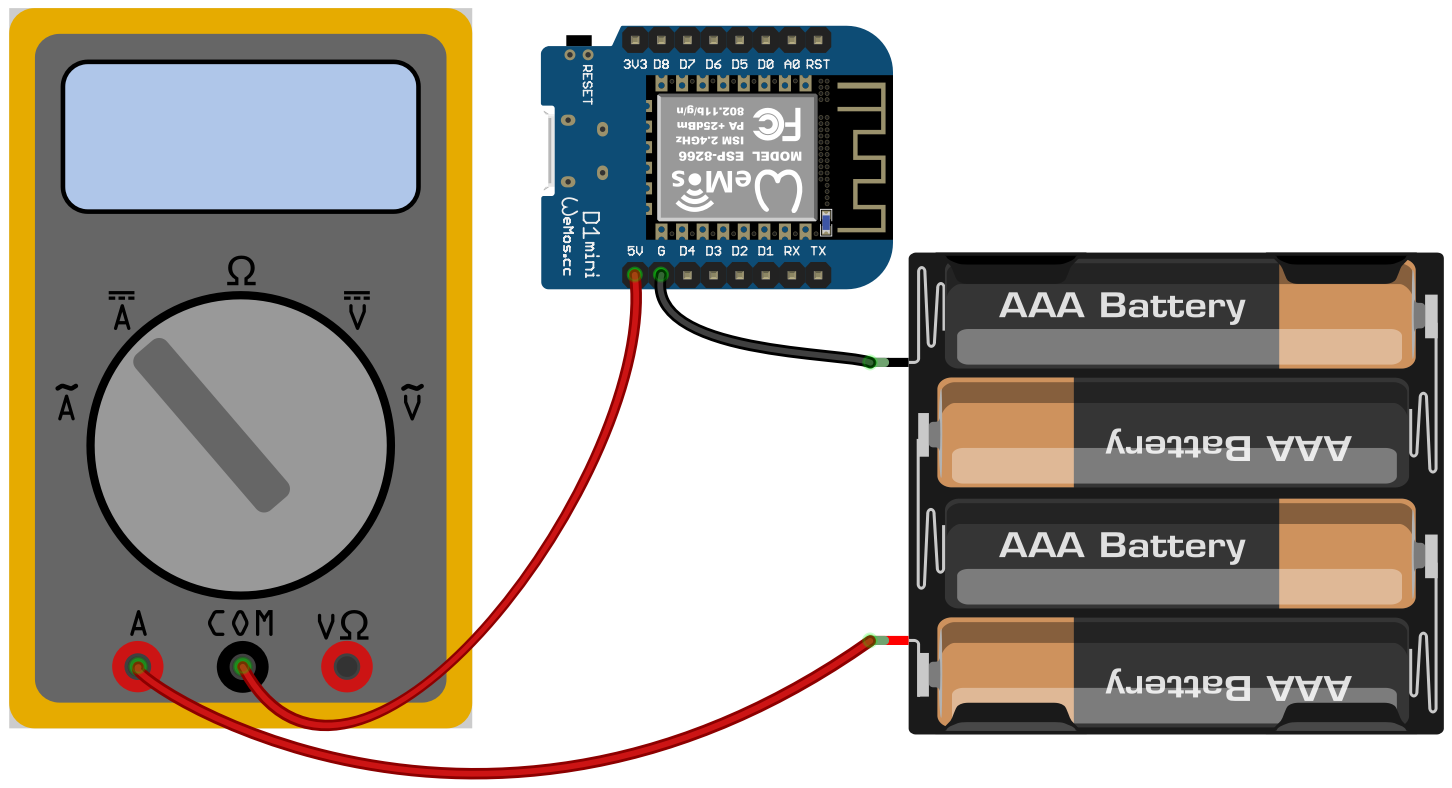
The measuring device is therefore connected in series to the power supply. The multimeter has resistors installed internally, across which a certain voltage drops depending on the current. Different resistors are used for each measuring range, i.e. amps, milliamps or microamps. This is the reason why you have to switch the measuring range in the first place. These values can easily be measured with an ohmmeter. My multimeter has the following values:
| Ampere: | 1,3 Ω |
| Milliampere: | 3,3 Ω |
| Microampere: | 102,8 Ω |
The microcontroller also behaves like a resistor from the point of view of the power supply. The simplified circuit diagram then looks as follows:

What happens now when the multimeter is connected in series with the microcontroller? This requires calculating the voltages that drop across the individual resistors. The resistance of the multimeter is known for each measuring range, but the resistance of the microcontroller is still missing. However, this can be calculated quite easily. I assume that the microcontroller requires a maximum of 300 mA, but only 15 µA in deep sleep mode. Ohm's law R = U / I results in the values 16.6 Ω and 333.3 kΩ respectively. The voltages can now be calculated using the formula for a voltage divider U = (UTot * RX) / (R1 + R2). The following values result, depending on whether the multimeter is in milliampere or microampere mode:
| Operating mode | UMultimeter | UMicrocontroller | Modus |
|---|---|---|---|
| Milliampere | 0,83 V | 4,17 V | Full load |
| Microampere | 4,3 V | 0,7 V | |
| Milliampere | 0,0000495 V | 4,9999505 V | Deep Sleep |
| Microampere | 0,0015 V | 4,9985 V |
What can be read from this table? If the multimeter is operated in milliamp mode, the microcontroller works as expected, as the required voltage is only 3.3 V. However, the display is so inaccurate that precise values for deep sleep mode cannot be determined. The microcontroller also works normally in microamp mode as long as it is in deep sleep mode. However, as soon as it is running under full load, so much voltage drops across the internal resistance of the multimeter that the microcontroller is no longer adequately supplied. This phenomenon is called brownout, in contrast to blackout, where the voltage fails completely.
Power Profiler-Kit II
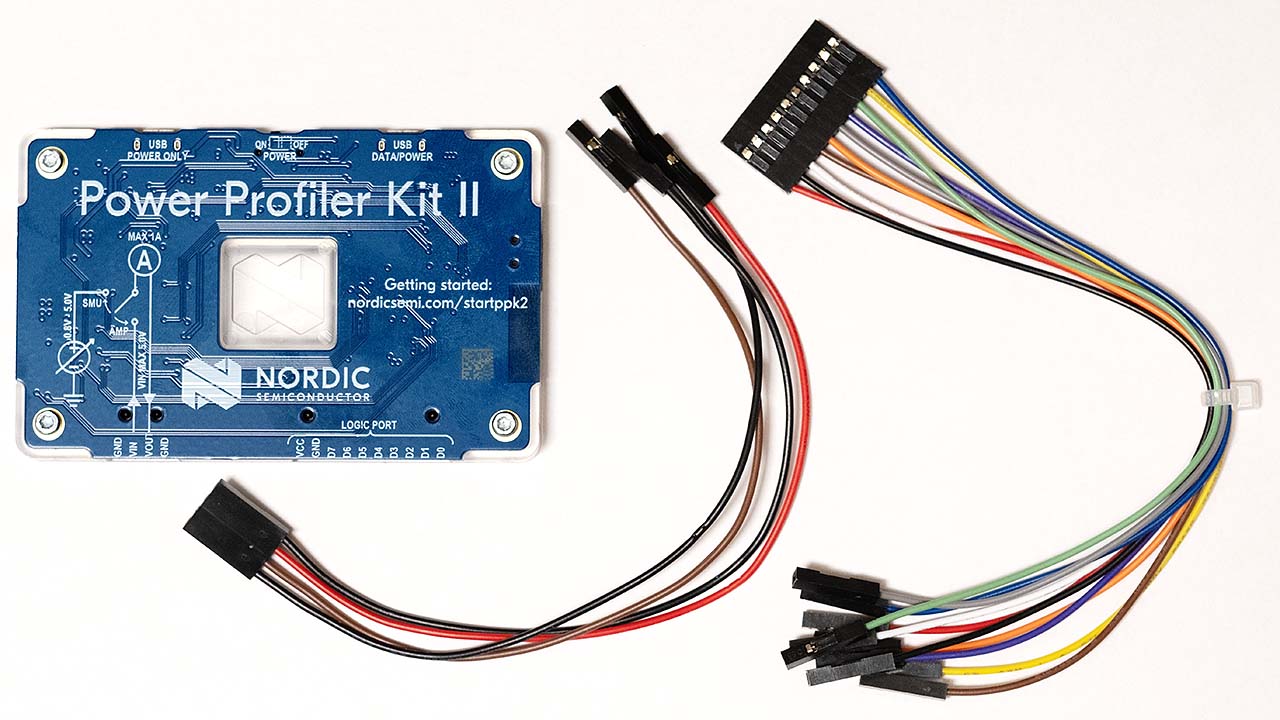
The Power Profiler Kit II (PPK2) from Nordic Semiconductor solves both of these problems. This tool makes it possible to measure power consumption in real time, automatically switching between five power measurement ranges. I bought my Power Profiler Kit II from Digi-Key for just under 100 euros. This is not exactly cheap for the hobby sector, but other comparable devices are considerably more expensive.
The most important features of the Power Profiler Kit II are
- Precise current measurement: The PPK2 can measure currents from 200 nA to 1 A with a resolution of 100 nA to 1 mA. This enables accurate measurement of current consumption in various operating states, even at very low power consumption levels.
- Flexible power supply: The PPK2 can be used either as a current source (Source measure unit mode) or as a current meter (Ampere meter only mode). In current source mode, the PPK2 can supply a software adjustable voltage from 0.8 V to 5.0 V and a current from 1 µA to 1 A.
- Digital inputs: The PPK2 has eight digital inputs that can be used as a simple logic analyzer. This enables the correlation of current consumption measurements with software events.
- Sample rate: The sample rate of the PPK2 can be set from 100 Hz to 100 kHz. This allows you to select the optimum resolution and update rate for the measurement.
- Standalone device: The PPK2 is a standalone device that requires no additional hardware. It can simply be connected to a PC or Mac via a USB cable.
Before the PPK2 can be used, the nRF Connect for Desktop must first be installed. The Power Profiler app is then installed within this application. This app also installs the firmware for the Power Profiler Kit II the first time it is started. Detailed documentation is available on the Nordic Semiconductor website.
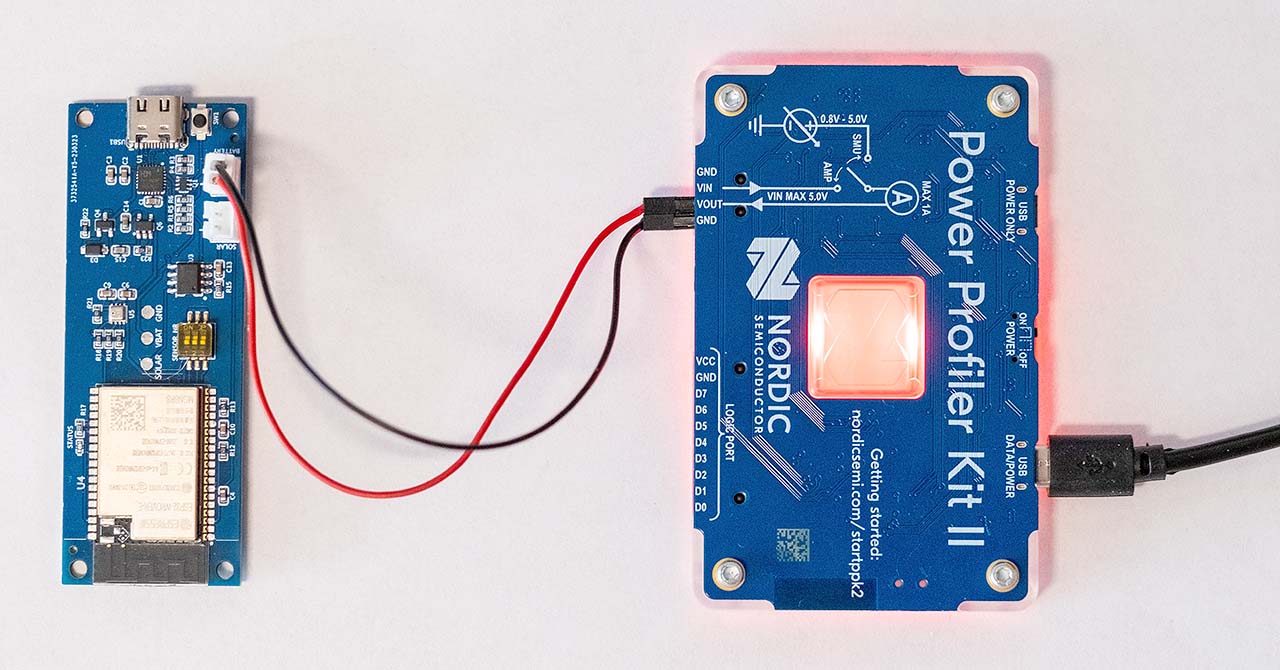
This completes the installation. Now you can measure. I use the PPK2 in Source Measure Unit mode. In this mode, only the VOUT and GND pins need to be connected to the microcontroller.
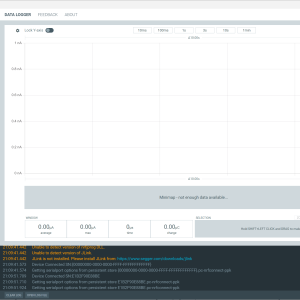
The PPK2 device is first selected in the application. In my case, I set the supply voltage to 4.2 V, which corresponds to a charged lithium-ion battery. Finally, set the sample rate and how long the measurement should take. As soon as you press the start button, the measurement begins.
How much power do the weather station sensors really consume?
In my article about the ESP32 weather station, I was only able to estimate the power consumption approximately. Only in Deep Sleep mode did I manage to measure the consumption precisely with the help of a trick. So I was very curious to see how high the values actually are.
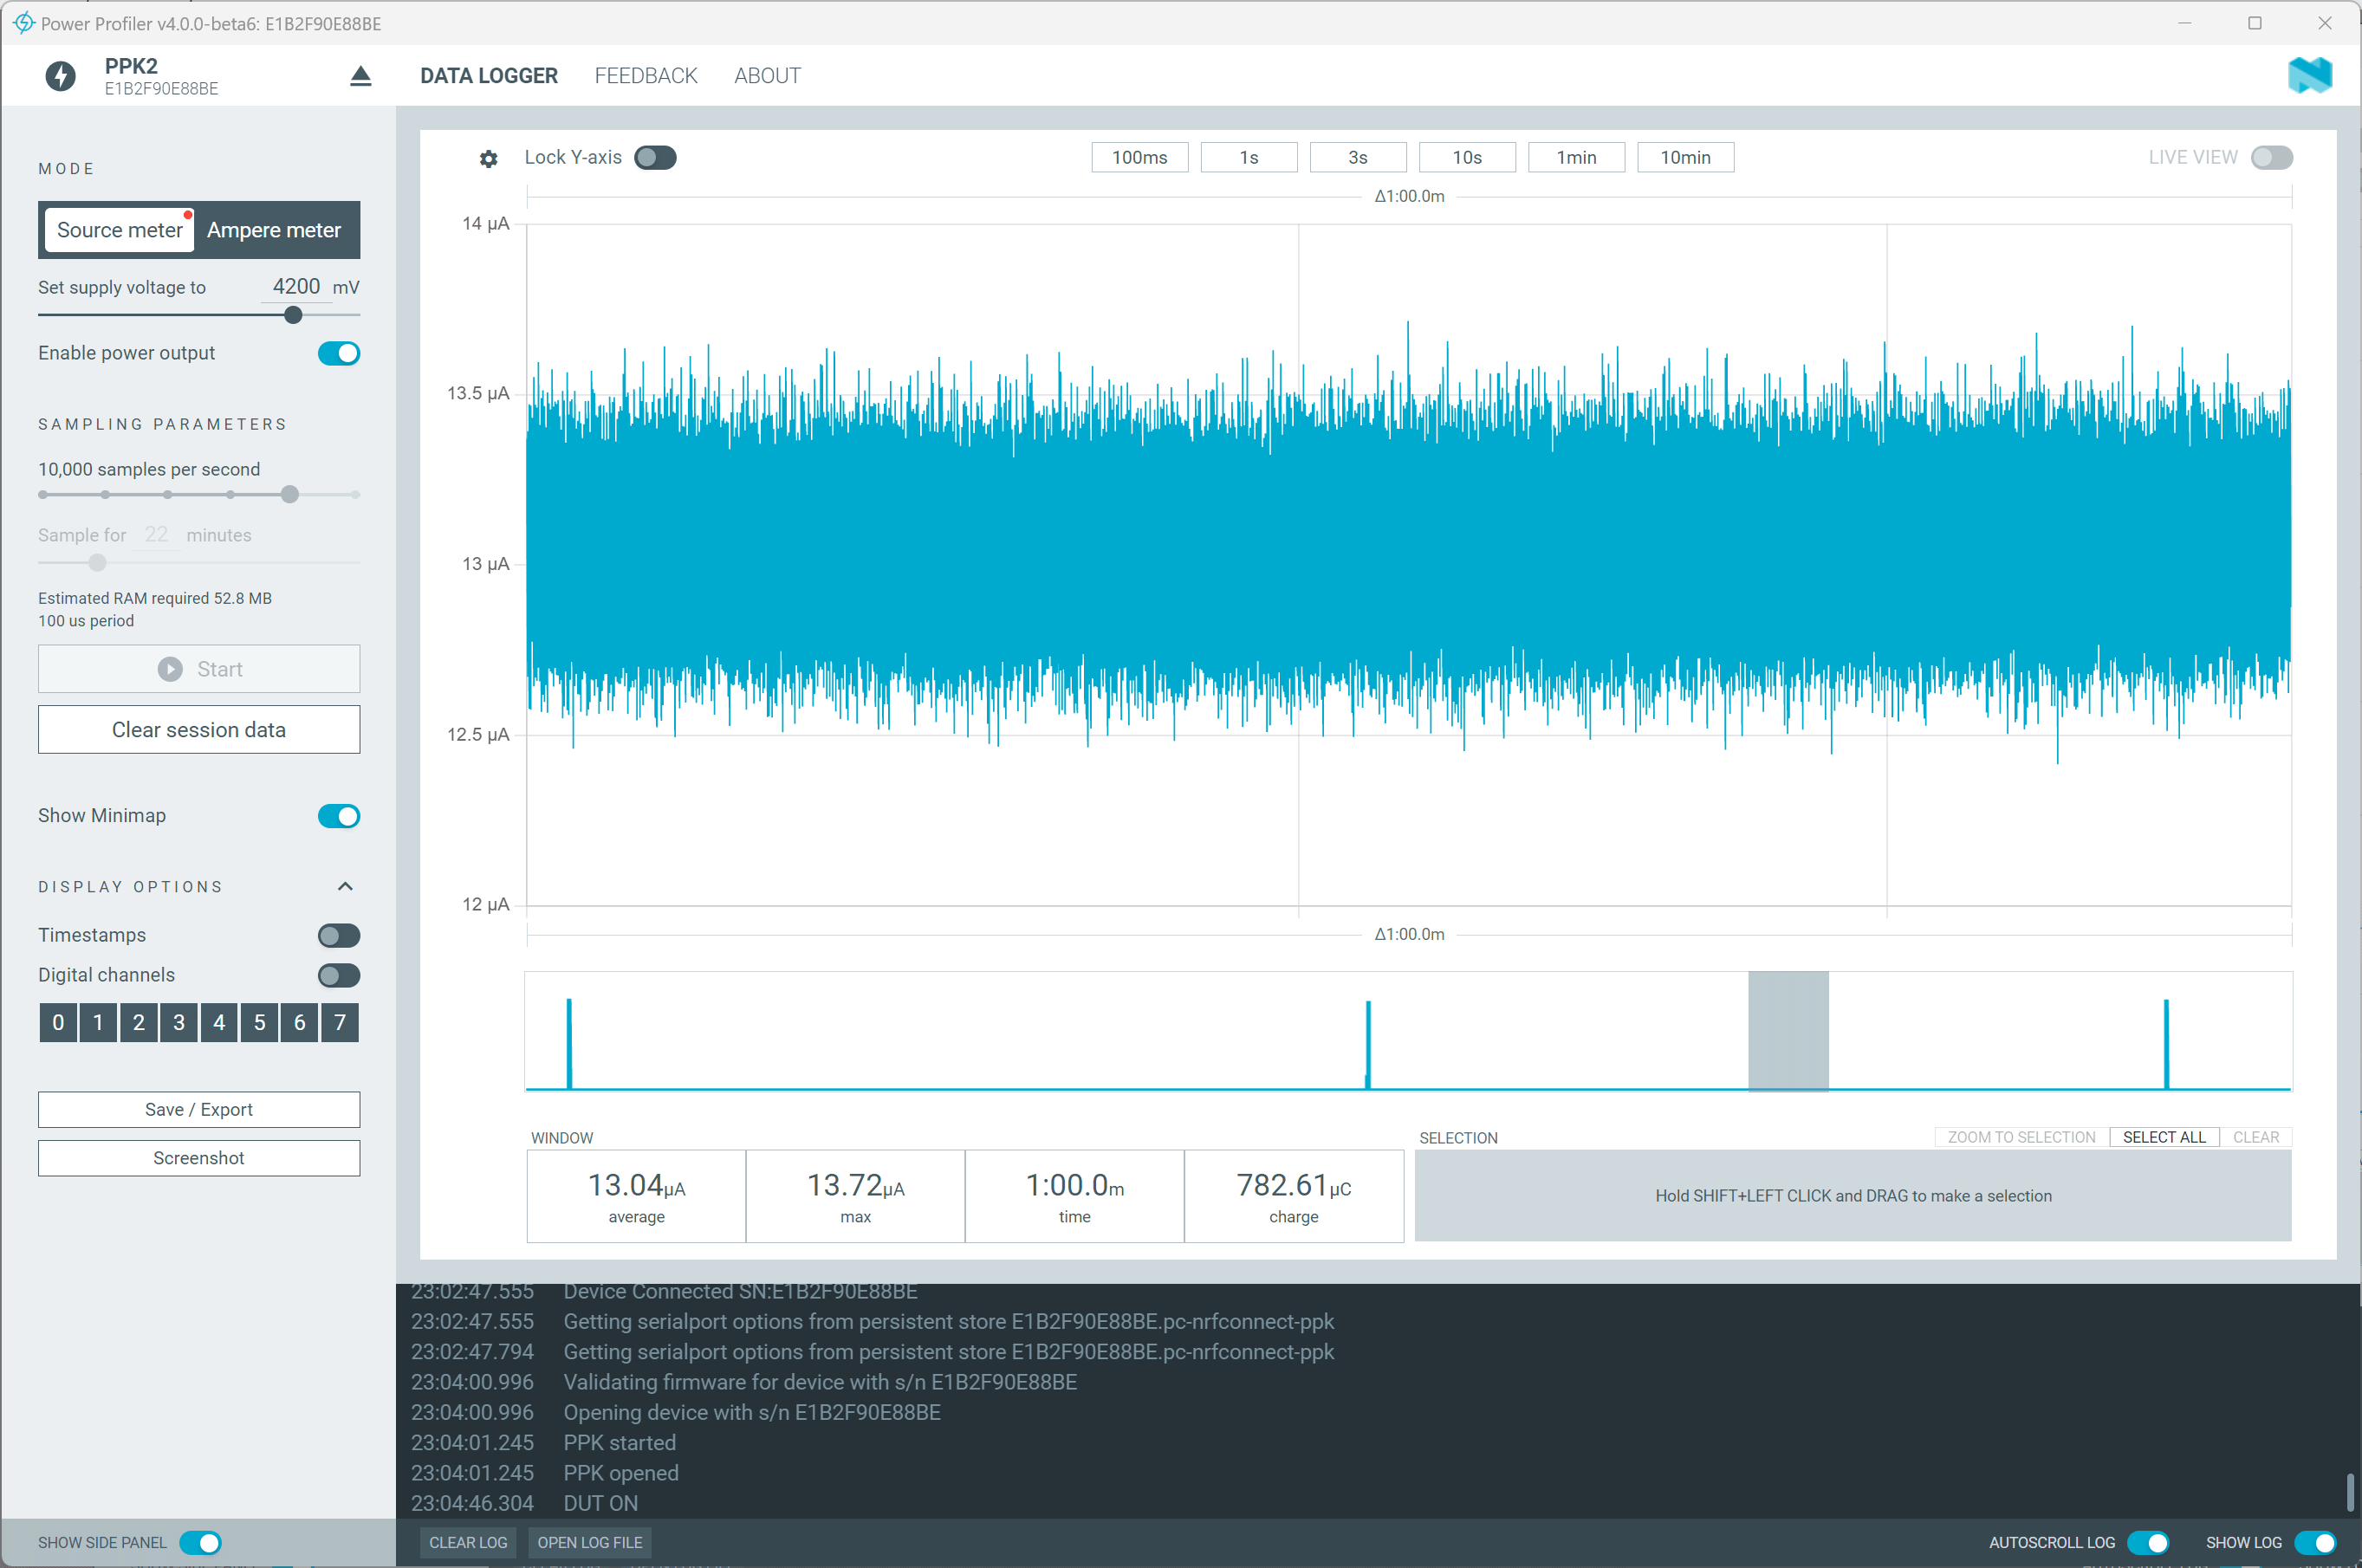
Here is a screenshot showing the power consumption in deep sleep mode. The 13.04 µA is very close to the 12.8 µA displayed by the multimeter.
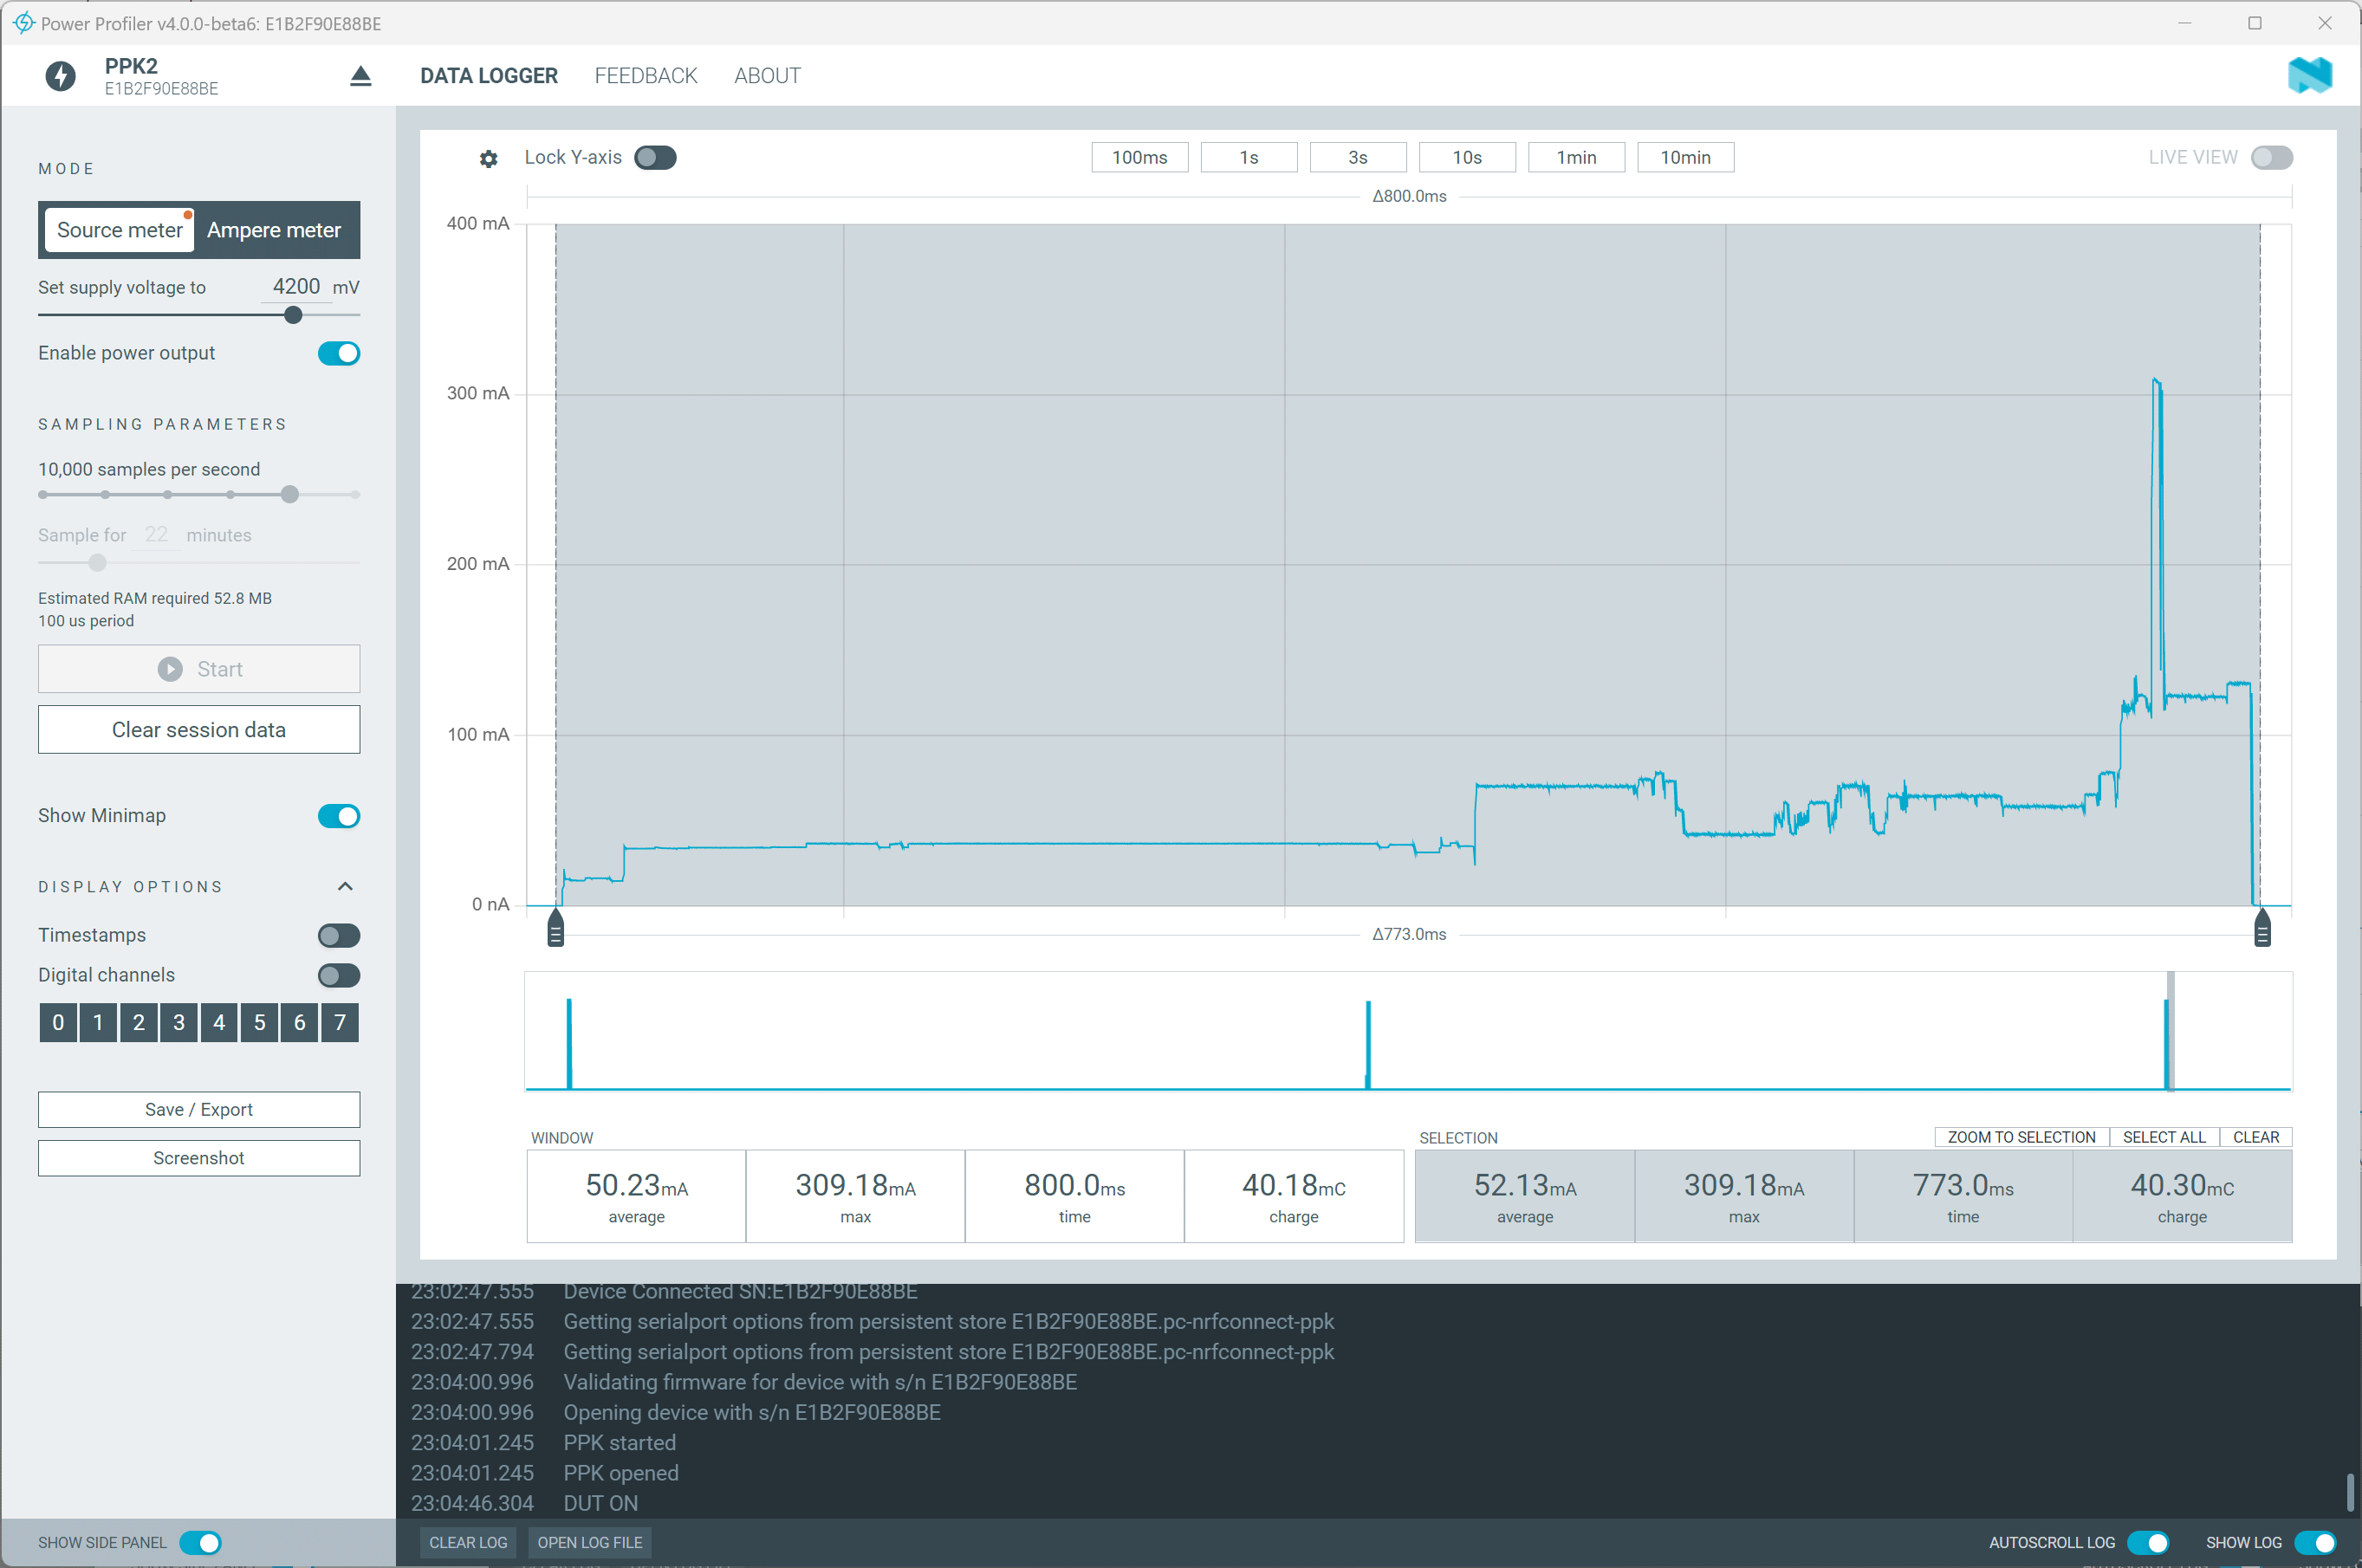
The second screenshot shows the consumption in active mode. As you can see, the value briefly rises to over 300 mA. During this period, the Wi-Fi module is active and transmitting data. However, the average value of 50.23 mA is significantly lower than the 200 mA I assumed at the time.
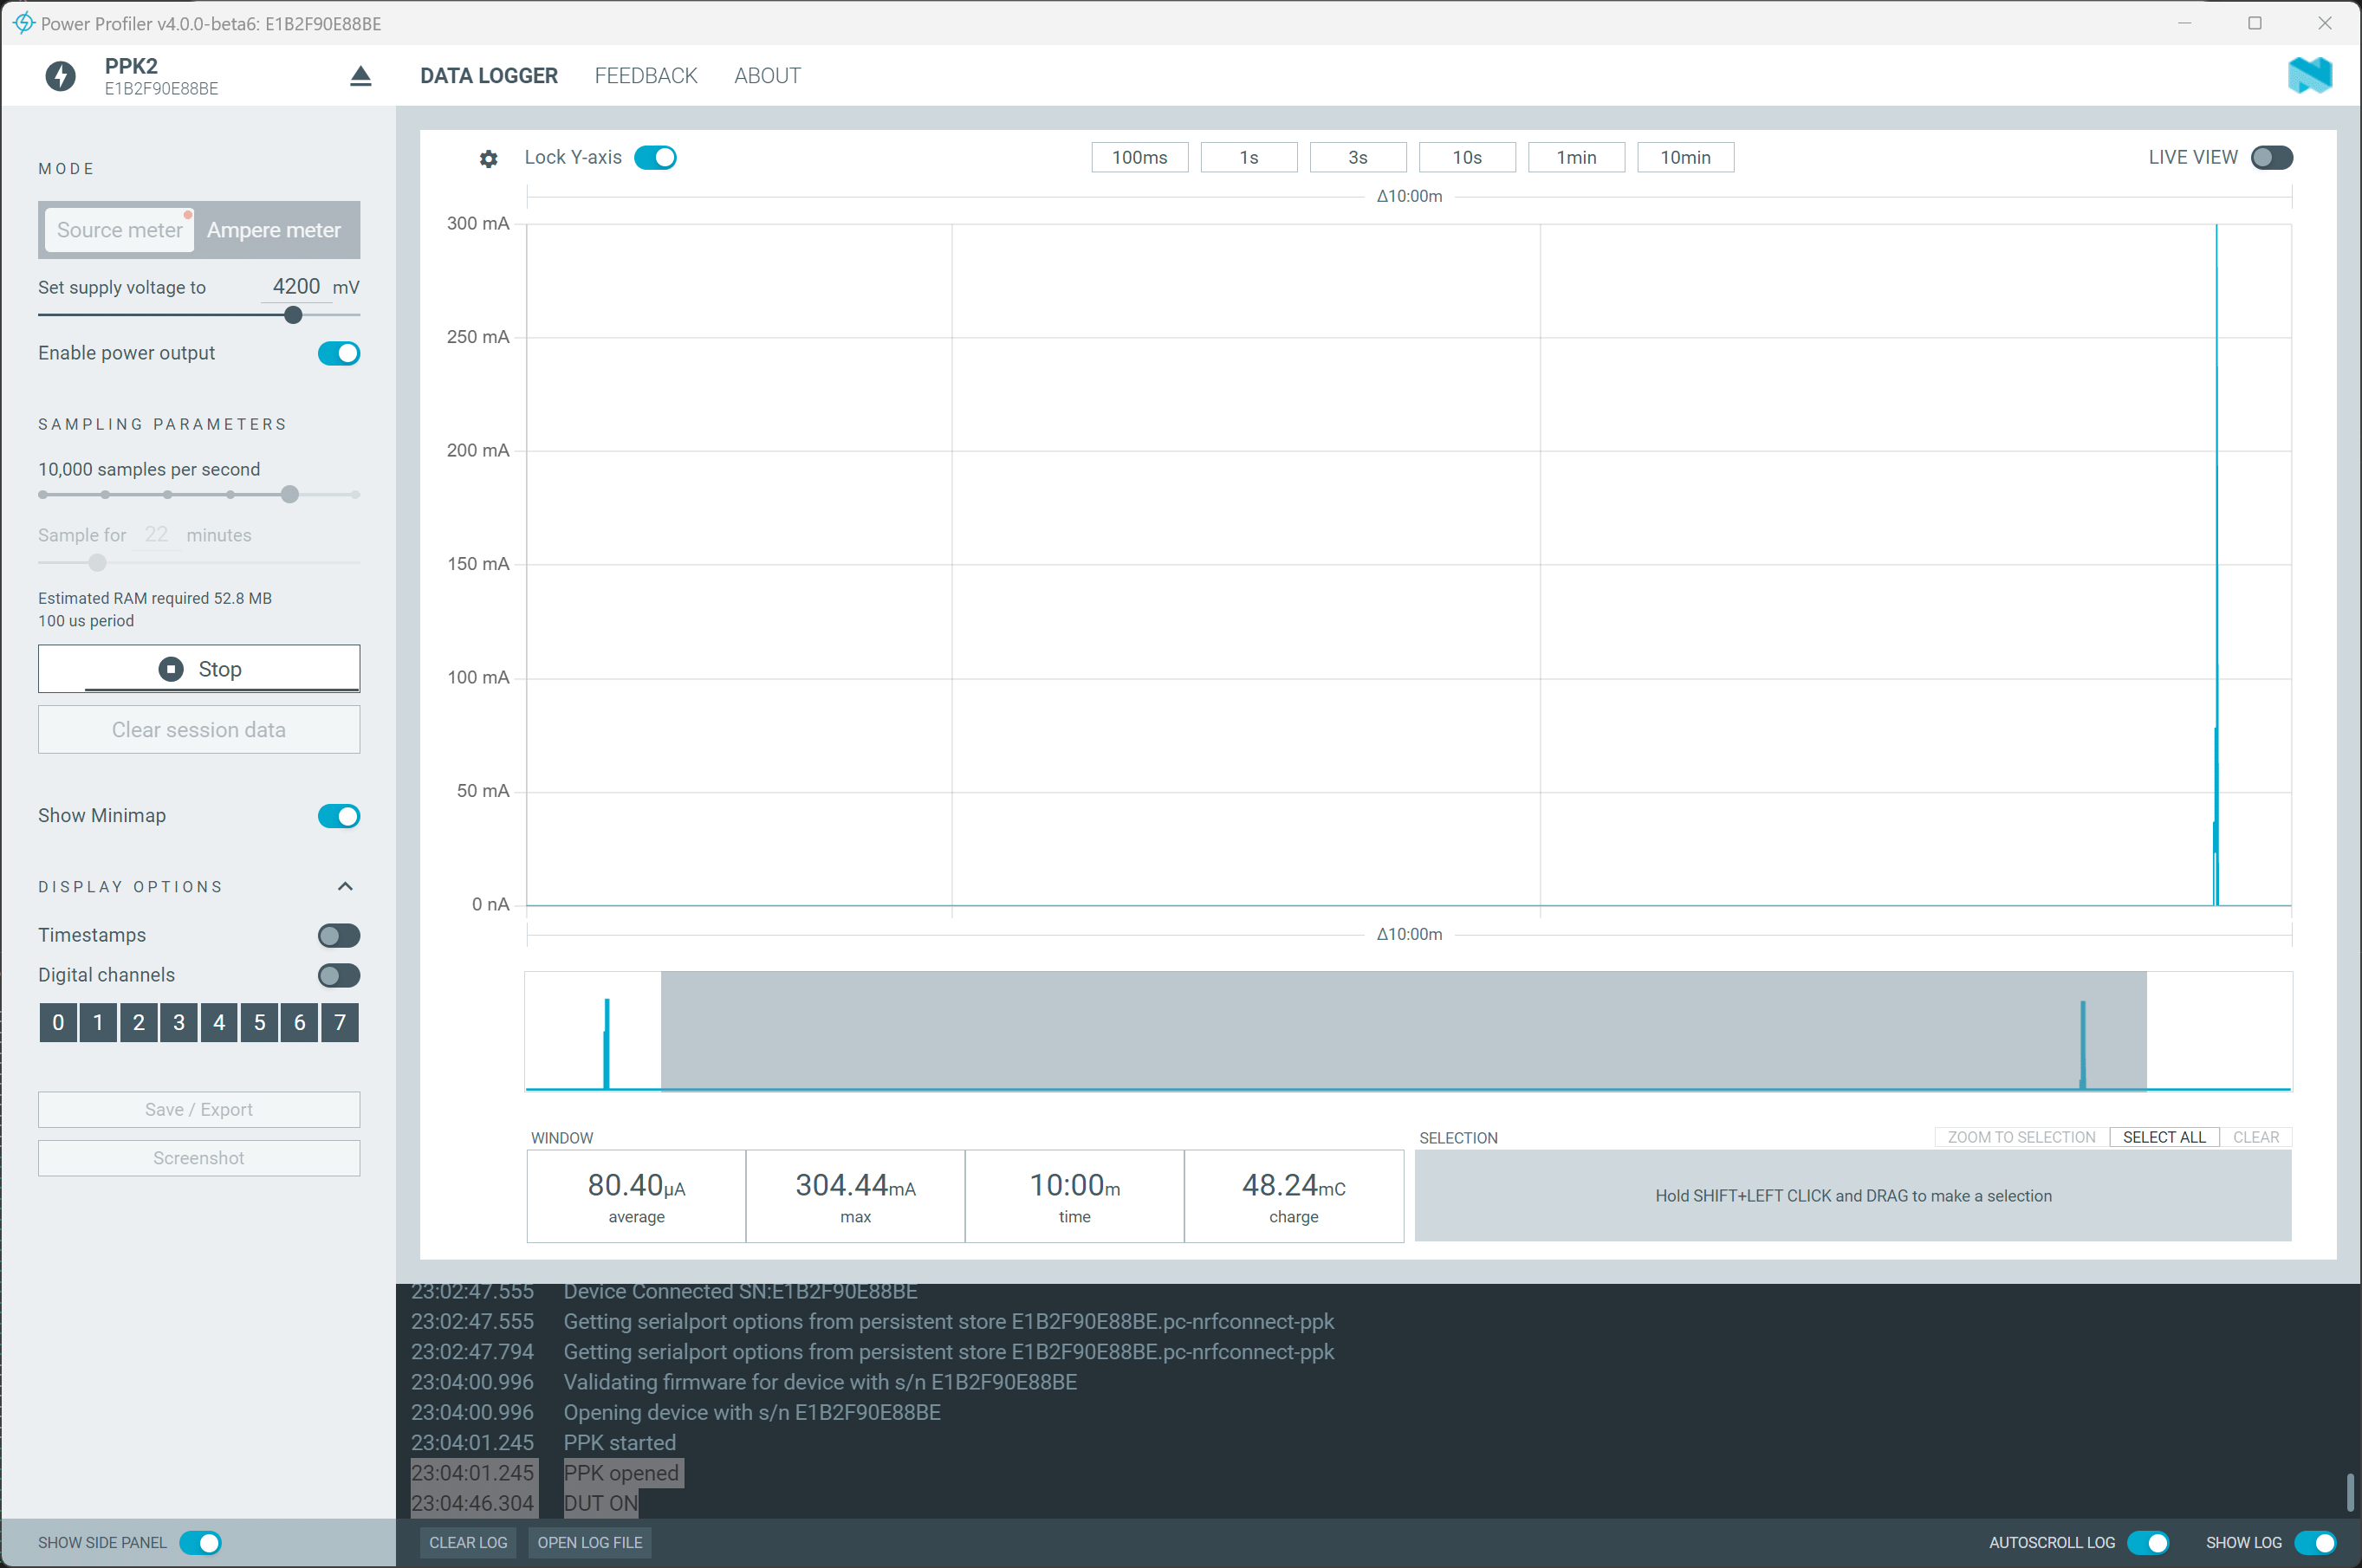
Finally, the last screenshot shows the average over an interval of 10 minutes. This is exactly the amount of time that the sensor is in deep sleep mode and then sends data again. The PPK2 shows a value of 80.4 µA here.
This makes it easy to calculate how long a lithium-ion battery would last. With a capacity of 2000 mAh, this results in 2000 mAh / 0.0804 mA = 24,876 hours. That's 1036 days, or almost three years. I have misjudged this by a factor of 3! Knowing this, I naturally ask myself whether all the charging electronics were necessary at all. Charging the battery every three years is not that bad...
I don't think you can show more clearly how important such a tool can be. My weather station is not a commercial product, so it doesn't matter in this case, but in the professional sector this information would be very important. In any case, I'm very glad that I bought the Power Profiler Kit II, even though I probably won't need it very often.
