Create LVGL screenshots on the ESP32 and send them via HTTP
While writing the articles about the ESP32 weather station, I came across a small problem that sounds quite simple at first, but turned out to be a bit more complicated than I thought. How do you take a screenshot of an LVGL screen running on an ESP32 microcontroller?
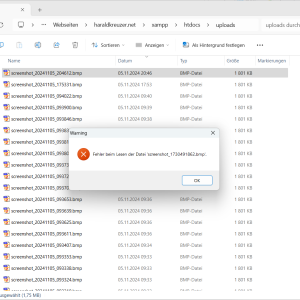
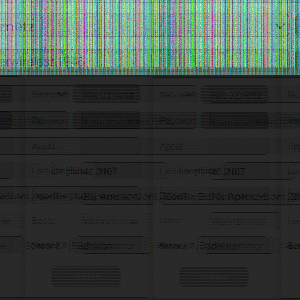
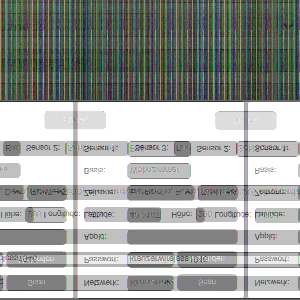
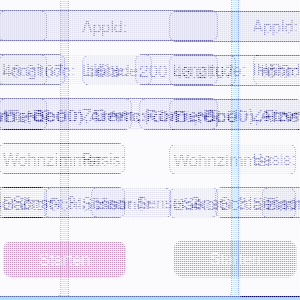
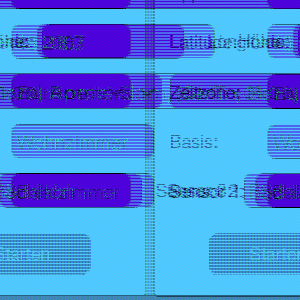
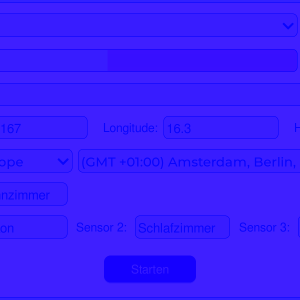
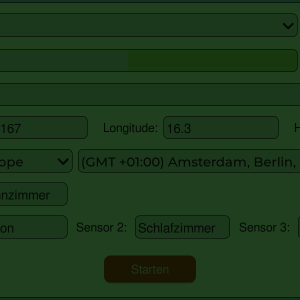
Fortunately, there is no need to reinvent the wheel. LVGL provides several functions to create screenshots. In LVGL this is called a snapshot. However, the documentation is not very comprehensive: https://docs.lvgl.io/8.4/others/snapshot.html. These LVGL functions return a pointer of the type lv_img_dsc_t, but this is not yet an image that can be opened with another program. The image data must first be converted into an appropriate image format. I use the bitmap format for this, as it is a very simple format and can be opened by any image viewer. However, you can still make a lot of mistakes, as the following pictures of my first attempts show...
Now the images need to be saved somewhere. Many of the ESP32 displays have an SD card slot, so it would make sense to save the images there. In my case, however, I would have to disassemble the weather station every time to get to the SD card. I have therefore opted for a different solution. As the ESP32 has a Wi-Fi module, the image can also simply be sent wirelessly via the HTTP protocol. All you need is a web server that can receive the images.I use the XAMPP package for this, which is very easy to install. First download the ZIP file, unpack it and start the setup_xampp.bat script. The web server is then started with xampp_start.exe. As you can see, I use Windows, I assume it will be similar with Linux or MacOS.
The last open point is the time at which a screenshot is created. There are several options here. You could define an event in LVGL that creates a screenshot. However, I would only have to adapt the layout because of the screenshots. A hardware solution would also be conceivable, where you can trigger the screenshot with a button. I did it a little differently. A task in the background simply takes screenshots at regular intervals, with the interval defined as a parameter. This way I can simply go through all the screens, try out all the features and don't have to worry about taking the screenshots. The individual images end up on my PC automatically.
Here is the ESP program. It is simply started with
start_screenshot(60, 10);
The first number is the time in seconds when the first screenshot is taken. The second number is the interval at which the screenshots are taken. The WLAN connection must be established before the call so that the image data can be sent.
The header file:
#ifndef LV_SCREENSHOT_H
#define LV_SCREENSHOT_H

#ifdef __cplusplus
extern "C" {
#endif


#include <stdint.h>


typedef struct {
    uint32_t initial_delay;
    uint32_t task_delay;
} screenshot_task_params_t;

typedef struct {
    uint16_t file_type;      // File type identifier (BM)
    uint32_t file_size;      // Size of the BMP file in bytes
    uint16_t reserved1;     // Reserved; must be zero
    uint16_t reserved2;     // Reserved; must be zero
    uint32_t offset_data;    // Offset from beginning of file to the image data
} __attribute__((packed)) bitmap_fileheader;

typedef struct {
    uint32_t size;           // Size of this header (40 bytes)
    int32_t  width;          // Image width in pixels
    int32_t  height;         // Image height in pixels
    uint16_t planes;         // Number of color planes
    uint16_t bit_count;      // Bits per pixel (24 for 24-bit RGB)
    uint32_t compression;    // Compression method (0 for none)
    uint32_t size_image;     // Size of the image data in bytes
    int32_t  x_pels_per_meter; // Horizontal resolution in pixels per meter
    int32_t  y_pels_per_meter; // Vertical resolution in pixels per meter
    uint32_t clr_used;       // Number of colors in the color palette
    uint32_t clr_important;  // Number of important colors used
} __attribute__((packed)) bitmap_infoheader;


void start_screenshot(uint32_t initial_delay, uint32_t task_delay);


#ifdef __cplusplus
} /*extern "C"*/
#endif

#endif /*LV_SCREENSHOT_H*/
And the actual program. I assume that the value LV_COLOR_DEPTH in the LVGL configuration file lv_conf.h is set to 16 bits. For other values, the code would have to be adapted accordingly.
#include <stdio.h> #include "esp_log.h" #include "esp_heap_caps.h" #include "esp_http_client.h" #include "lvgl.h" #include "lv_screenshot.h" #define WEBSERVER "http://192.168.0.101/upload.php" // Replace with your server URL static const char* TAG = "screenhot"; /** * @brief Convert LVGL screenshot data to BMP format and send it to a web server via HTTP POST. * * This function takes an LVGL image descriptor, converts the image data to BMP format, and sends it to a specified server. * It constructs a BMP file header, processes pixel data from 16-bit to 24-bit format, and then sends the formatted image * via HTTP POST. * * @param snapshot Pointer to the `lv_img_dsc_t` structure containing the LVGL image data. * @param width Width of the image in pixels. * @param height Height of the image in pixels. * * @return * - ESP_OK on successful upload * - ESP_FAIL if memory allocation fails or if HTTP POST fails * * @note * - The server URL should be defined in `WEBSERVER`. * - BMP format is created using a 24-bit color depth (8 bits per RGB channel). * - Ensure sufficient SPIRAM is available for the BMP data buffer. * * @remarks * - `bitmap_fileheader` and `bitmap_infoheader` should be structures defining BMP file and info headers. * - The server should support binary data upload with `Content-Type` set to "application/octet-stream". */ esp_err_t send_screenshot_to_server(lv_img_dsc_t *snapshot, uint32_t width, uint32_t height) { // BMP header size calculation uint8_t bpp = 24; // Assuming 24-bit BMP uint32_t header_size = sizeof(bitmap_fileheader) + sizeof(bitmap_infoheader); uint32_t image_size = width * height * (bpp / 8); uint32_t file_size = header_size + image_size; // Allocate memory for the BMP data uint8_t *bmp_data = (uint8_t *)heap_caps_malloc(file_size, MALLOC_CAP_32BIT | MALLOC_CAP_SPIRAM); if (!bmp_data) { ESP_LOGE(TAG, "Failed to allocate memory for BMP data"); return ESP_FAIL; } bitmap_fileheader file_header; bitmap_infoheader info_header; file_header.file_type = 0x4D42; // 'BM' file_header.file_size = file_size; file_header.reserved1 = 0; file_header.reserved2 = 0; file_header.offset_data = sizeof(bitmap_fileheader) + sizeof(bitmap_infoheader); info_header.size = sizeof(bitmap_infoheader); info_header.width = width; info_header.height = height; info_header.planes = 1; info_header.bit_count = 24; info_header.compression = 0; info_header.size_image = image_size; info_header.x_pels_per_meter = 0; // You can set these if needed info_header.y_pels_per_meter = 0; info_header.clr_used = 0; info_header.clr_important = 0; // Copy the header structures to the BMP data memcpy(bmp_data, &file_header, sizeof(bitmap_fileheader)); memcpy(bmp_data + sizeof(bitmap_fileheader), &info_header, sizeof(bitmap_infoheader)); // Convert LVGL image data to BMP format uint8_t *pixel_data = bmp_data + header_size; for (int y = height - 1; y >= 0; y--) { for (int x = 0; x < width; x++) { lv_color_t color = lv_img_buf_get_px_color(snapshot, x, y, lv_color_white()); // 16 Bit to 24 Bit conversion *pixel_data++ = color.ch.blue << 3; *pixel_data++ = color.ch.green << 2; *pixel_data++ = color.ch.red << 3; } } // Set up HTTP request esp_http_client_config_t config = { .url = WEBSERVER, .method = HTTP_METHOD_POST, }; esp_http_client_handle_t client = esp_http_client_init(&config); // Set the headers and body esp_http_client_set_header(client, "Content-Type", "application/octet-stream"); esp_http_client_set_post_field(client, (const char *)bmp_data, file_size); // Perform the HTTP POST request esp_err_t err = esp_http_client_perform(client); if (err == ESP_OK) { ESP_LOGI(TAG, "Screenshot uploaded successfully"); } else { ESP_LOGE(TAG, "HTTP POST request failed: %s", esp_err_to_name(err)); } // Clean up esp_http_client_cleanup(client); heap_caps_free(bmp_data); return err; } /** * @brief Capture a screenshot of the active LVGL screen and send it to a server. * * This function captures the current LVGL screen and saves the image data to a buffer in SPIRAM. * It then sends the image buffer to a server and frees the allocated memory. * * @return * - ESP_OK on success * - ESP_FAIL if memory allocation or screenshot capture fails * * @note * - The function uses LVGL's `lv_snapshot_take_to_buf` to capture the screen content and * `send_screenshot_to_server` to send the data to an HTTP server. * - Screen width and height are retrieved dynamically based on the active screen. */ esp_err_t make_screenshot() { lv_obj_t * screen = lv_scr_act(); lv_img_dsc_t snapshot; uint32_t width = lv_obj_get_width(screen); uint32_t height = lv_obj_get_height(screen); uint32_t data_size = width * height * sizeof(lv_color_t); // Allocate buffer for the image data in SPIRAM uint8_t *img_data = (uint8_t *)heap_caps_malloc(data_size, MALLOC_CAP_32BIT | MALLOC_CAP_SPIRAM); if (img_data == NULL) { ESP_LOGE(TAG, "Fehler beim Allozieren des Datenbuffers"); return ESP_FAIL; } snapshot.data = img_data; // Assign the allocated buffer to snapshot.data // Write screenshot to the buffer lv_res_t res = lv_snapshot_take_to_buf(screen, LV_IMG_CF_TRUE_COLOR, &snapshot, (uint8_t *)snapshot.data, data_size); if (res != LV_RES_OK) { ESP_LOGE(TAG, "Fehler beim Erstellen des Screenshots"); heap_caps_free(img_data); return ESP_FAIL; } // Write screenshot to server send_screenshot_to_server(&snapshot, width, height); // Send the snapshot directly via HTTP heap_caps_free(img_data); return ESP_OK; } /** * @brief Periodically captures and sends screenshots as part of a FreeRTOS task. * * This task waits for an initial delay before starting to capture screenshots at a regular interval. * It uses the `make_screenshot` function to capture the current screen and send it to a server. * * @param pvParameter Pointer to a `screenshot_task_params_t` structure containing the task parameters. * The structure should include: * - `initial_delay`: Initial delay in seconds before the first screenshot capture. * - `task_delay`: Delay in seconds between subsequent screenshot captures. * * @note * - The `screenshot_task_params_t` structure must be defined and initialized by the caller. * - Ensure sufficient memory and network availability for screenshot capture and transmission. * - The task runs indefinitely with a delay between captures. * * Example: * @code{c} * screenshot_task_params_t params = { * .initial_delay = 5, // 5 seconds delay before first screenshot * .task_delay = 60 // 60 seconds between each screenshot * }; * xTaskCreate(&screenshot_task, "screenshot_task", 4096, ¶ms, 5, NULL); * @endcode */ void screenshot_task(void *pvParameter){ ESP_LOGI(TAG, "Start Screenshot task"); screenshot_task_params_t *params = (screenshot_task_params_t *)pvParameter; vTaskDelay(pdMS_TO_TICKS(1000 * params->initial_delay)); for (;;) { make_screenshot(); vTaskDelay(pdMS_TO_TICKS(1000 * params->task_delay)); } } /** * @brief Initialize and start a task for periodic screenshot capturing and uploading. * * This function allocates memory for a `screenshot_task_params_t` structure, sets the * initial delay and task interval parameters, and starts the `screenshot_task` on the specified core. * * @param initial_delay Delay in seconds before the first screenshot is taken. * @param task_delay Delay in seconds between each subsequent screenshot capture. * * @note * - This function allocates memory for the parameters, so the caller should ensure * sufficient heap space is available. * - The task runs indefinitely, and the parameters are only set once upon initialization. * - This function pins `screenshot_task` to core 0. * * @return None * * Example: * @code{c} * start_screenshot(5, 60); // Starts screenshot task with 5 seconds initial delay and 60 seconds interval * @endcode */ void start_screenshot(uint32_t initial_delay, uint32_t task_delay) { // Allocate memory for the parameters struct screenshot_task_params_t *params = malloc(sizeof(screenshot_task_params_t)); // Assign the parameter values params->initial_delay = initial_delay; params->task_delay = task_delay; xTaskCreatePinnedToCore( screenshot_task, // Task function "Screeshot Task", // Task name 8000, // Stack size (bytes) params, // Task input parameter 16, // Task priority NULL, // Task handle 0 // Core to run the task on (0 or 1) ); }
Finally, the small PHP script that receives the image data. It must be located in the htdocs folder of the XAMPP installation.
<?php
// Directory to save uploaded files
$upload_dir = 'uploads/';

// Ensure the upload directory exists and is writable
if (!is_dir($upload_dir)) {
    mkdir($upload_dir, 0755, true); // Create the directory if it does not exist
}

// Generate a unique filename with a timestamp
$filename = $upload_dir . 'screenshot_' . date('Ymd_His') . '.bmp';

// Check if the HTTP POST body is not empty
if ($_SERVER['REQUEST_METHOD'] === 'POST' && !empty(file_get_contents("php://input"))) {
    // Open a file in write mode
    $file = fopen($filename, 'wb');
    if ($file) {
        // Write the HTTP POST data (binary image data) to the file
        $data = file_get_contents("php://input");
        fwrite($file, $data);
        fclose($file);
        echo "File uploaded successfully: " . $filename;
    } else {
        // Log an error if file couldn't be created
        http_response_code(500);
        echo "Failed to create file: Check directory permissions.";
    }
} else {
    // Log an error if no data was received
    http_response_code(400);
    echo "No data received.";
}
The weather station code contains a concrete example of how the function is used. This made it possible for me to create many screenshots for my article about the weather station without having to constantly insert and remove the SD card.
If you have any other ideas on how to make the tool even more useful, please let me know.
