LVGL Screenshots auf dem ESP32 erstellen und per HTTP versenden
Beim Schreiben der Artikel über die ESP32 Wetterstation bin ich auf ein kleines Problem gestoßen, das im ersten Moment zwar ganz einfach klingt, aber dann doch etwas komplizierter als gedacht war. Wie erstellt man einen Screenshot von einem LVGL Screen, der auf einem ESP32 Mikrocontroller läuft?
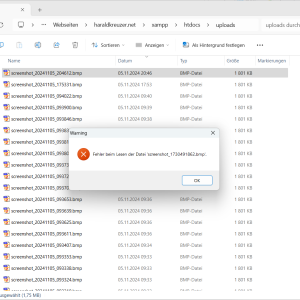
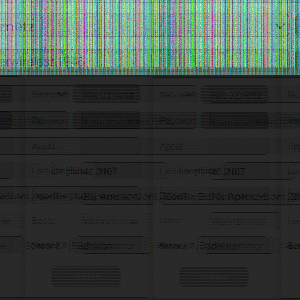
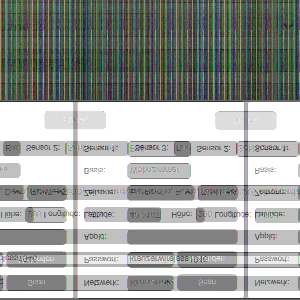
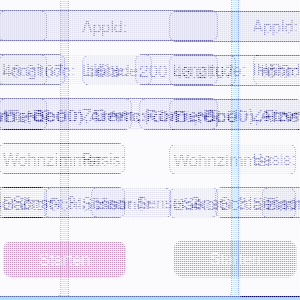
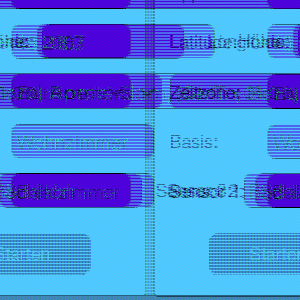
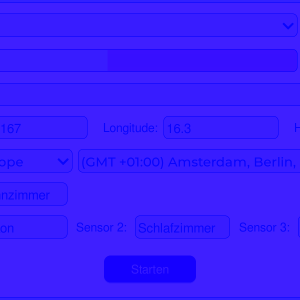
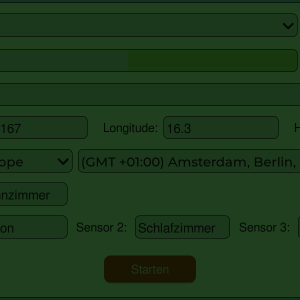
Glücklicherweise muss das Rad nicht neu erfunden werden. LVGL stellt einige Funktionen bereit, um Screenshots zu erstellen. Bei LVGL wird das Snapshot genannt. Allerdings ist die Dokumentation dazu nicht sehr umfangreich: https://docs.lvgl.io/8.4/others/snapshot.html. Diese LVGL Funktionen liefern einen Zeiger vom Typ lv_img_dsc_t zurück, dabei handelt es sich aber noch um kein Bild, das man mit einem anderen Programm öffnen kann. Dazu müssen die Bilddaten erst in ein entsprechendes Bildformat konvertiert werden. Ich verwende dazu das Bitmap-Format, da es ein sehr einfaches Format ist und von jedem Bildbetrachter geöffnet werden kann. Allerdings kann man dabei trotzdem viel falsch machen, wie die folgenden Bilder meiner ersten Versuche beweisen...
Jetzt müssen die Bilder irgendwo gespeichert werden. Viele der ESP32 Displays haben einen SD-Kartenslot, also wäre es naheliegend, die Bilder dort zu speichern. In meinem Fall ist es aber so, dass ich dann jedes Mal die Wetterstation zerlegen müsste, um an die SD-Karte zu kommen. Daher habe ich mich für eine andere Lösung entschieden. Da der ESP32 ein WLAN Modul hat, kann das Bild auch einfach drahtlos über das HTTP Protokoll verschickt werden. Dazu braucht man nur einen Webserver, der die Bilder empfangen kann. Dazu verwende ich das XAMPP Paket, das ganz einfach installiert werden kann. Zunächst wird das ZIP-File heruntergeladen, ausgepackt und das setup_xampp.bat Skript gestartet. Mit xampp_start.exe wird dann der Webserver gestartet. Wie man sieht, verwende ich Windows, ich nehme an, mit Linux oder MacOS wird es ähnlich sein.
Der letzte offene Punkt ist der Zeitpunkt, wann ein Screenshot erstellt wird. Hier gibt es mehrere Möglichkeiten. Man könnte in LVGL ein Event definieren, dass einen Screenshot erstellt. Dazu müsste ich aber nur wegen den Screenshots das Layout anpassen. Denkbar wäre auch eine Hardware Lösung, wo man mit einer Taste den Screenshot auslösen kann. Ich habe es etwas anders gemacht. Ein Task im Hintergrund erstellt einfach regelmäßig Screenshots, wobei das Intervall als Parameter definiert wird. So kann ich einfach durch alle Screens durchgehen, alle Features ausprobieren und muss mich nicht um das Erstellen der Screenshots kümmern. Die einzelnen Bilder landen ganz automatisch auf meinem PC.
Hier nun das ESP Programm. Es wird einfach mit
start_screenshot(60, 10);
aufgerufen. Die erste Zahl ist die Zeit in Sekunden, wann der erste Screenshot erstellt wird. Die zweite Zahl ist das Intervall, wie oft dann die Screenshots erstellt werden. Vor dem Aufruf muss die WLAN-Verbindung hergestellt werden, damit die Bilddaten verschickt werden können.
Das Header-File:
#ifndef LV_SCREENSHOT_H
#define LV_SCREENSHOT_H

#ifdef __cplusplus
extern "C" {
#endif


#include <stdint.h>


typedef struct {
    uint32_t initial_delay;
    uint32_t task_delay;
} screenshot_task_params_t;

typedef struct {
    uint16_t file_type;      // File type identifier (BM)
    uint32_t file_size;      // Size of the BMP file in bytes
    uint16_t reserved1;     // Reserved; must be zero
    uint16_t reserved2;     // Reserved; must be zero
    uint32_t offset_data;    // Offset from beginning of file to the image data
} __attribute__((packed)) bitmap_fileheader;

typedef struct {
    uint32_t size;           // Size of this header (40 bytes)
    int32_t  width;          // Image width in pixels
    int32_t  height;         // Image height in pixels
    uint16_t planes;         // Number of color planes
    uint16_t bit_count;      // Bits per pixel (24 for 24-bit RGB)
    uint32_t compression;    // Compression method (0 for none)
    uint32_t size_image;     // Size of the image data in bytes
    int32_t  x_pels_per_meter; // Horizontal resolution in pixels per meter
    int32_t  y_pels_per_meter; // Vertical resolution in pixels per meter
    uint32_t clr_used;       // Number of colors in the color palette
    uint32_t clr_important;  // Number of important colors used
} __attribute__((packed)) bitmap_infoheader;


void start_screenshot(uint32_t initial_delay, uint32_t task_delay);


#ifdef __cplusplus
} /*extern "C"*/
#endif

#endif /*LV_SCREENSHOT_H*/
Und das eigentliche Programm. Ich setze dabei voraus, dass in der LVGL Konfigurationsdatei lv_conf.h der Wert LV_COLOR_DEPTH auf 16 Bit eingestellt ist. Für andere Werte müsste der Code noch entsprechend angepasst werden.
#include <stdio.h> #include "esp_log.h" #include "esp_heap_caps.h" #include "esp_http_client.h" #include "lvgl.h" #include "lv_screenshot.h" #define WEBSERVER "http://192.168.0.101/upload.php" // Replace with your server URL static const char* TAG = "screenhot"; /** * @brief Convert LVGL screenshot data to BMP format and send it to a web server via HTTP POST. * * This function takes an LVGL image descriptor, converts the image data to BMP format, and sends it to a specified server. * It constructs a BMP file header, processes pixel data from 16-bit to 24-bit format, and then sends the formatted image * via HTTP POST. * * @param snapshot Pointer to the `lv_img_dsc_t` structure containing the LVGL image data. * @param width Width of the image in pixels. * @param height Height of the image in pixels. * * @return * - ESP_OK on successful upload * - ESP_FAIL if memory allocation fails or if HTTP POST fails * * @note * - The server URL should be defined in `WEBSERVER`. * - BMP format is created using a 24-bit color depth (8 bits per RGB channel). * - Ensure sufficient SPIRAM is available for the BMP data buffer. * * @remarks * - `bitmap_fileheader` and `bitmap_infoheader` should be structures defining BMP file and info headers. * - The server should support binary data upload with `Content-Type` set to "application/octet-stream". */ esp_err_t send_screenshot_to_server(lv_img_dsc_t *snapshot, uint32_t width, uint32_t height) { // BMP header size calculation uint8_t bpp = 24; // Assuming 24-bit BMP uint32_t header_size = sizeof(bitmap_fileheader) + sizeof(bitmap_infoheader); uint32_t image_size = width * height * (bpp / 8); uint32_t file_size = header_size + image_size; // Allocate memory for the BMP data uint8_t *bmp_data = (uint8_t *)heap_caps_malloc(file_size, MALLOC_CAP_32BIT | MALLOC_CAP_SPIRAM); if (!bmp_data) { ESP_LOGE(TAG, "Failed to allocate memory for BMP data"); return ESP_FAIL; } bitmap_fileheader file_header; bitmap_infoheader info_header; file_header.file_type = 0x4D42; // 'BM' file_header.file_size = file_size; file_header.reserved1 = 0; file_header.reserved2 = 0; file_header.offset_data = sizeof(bitmap_fileheader) + sizeof(bitmap_infoheader); info_header.size = sizeof(bitmap_infoheader); info_header.width = width; info_header.height = height; info_header.planes = 1; info_header.bit_count = 24; info_header.compression = 0; info_header.size_image = image_size; info_header.x_pels_per_meter = 0; // You can set these if needed info_header.y_pels_per_meter = 0; info_header.clr_used = 0; info_header.clr_important = 0; // Copy the header structures to the BMP data memcpy(bmp_data, &file_header, sizeof(bitmap_fileheader)); memcpy(bmp_data + sizeof(bitmap_fileheader), &info_header, sizeof(bitmap_infoheader)); // Convert LVGL image data to BMP format uint8_t *pixel_data = bmp_data + header_size; for (int y = height - 1; y >= 0; y--) { for (int x = 0; x < width; x++) { lv_color_t color = lv_img_buf_get_px_color(snapshot, x, y, lv_color_white()); // 16 Bit to 24 Bit conversion *pixel_data++ = color.ch.blue << 3; *pixel_data++ = color.ch.green << 2; *pixel_data++ = color.ch.red << 3; } } // Set up HTTP request esp_http_client_config_t config = { .url = WEBSERVER, .method = HTTP_METHOD_POST, }; esp_http_client_handle_t client = esp_http_client_init(&config); // Set the headers and body esp_http_client_set_header(client, "Content-Type", "application/octet-stream"); esp_http_client_set_post_field(client, (const char *)bmp_data, file_size); // Perform the HTTP POST request esp_err_t err = esp_http_client_perform(client); if (err == ESP_OK) { ESP_LOGI(TAG, "Screenshot uploaded successfully"); } else { ESP_LOGE(TAG, "HTTP POST request failed: %s", esp_err_to_name(err)); } // Clean up esp_http_client_cleanup(client); heap_caps_free(bmp_data); return err; } /** * @brief Capture a screenshot of the active LVGL screen and send it to a server. * * This function captures the current LVGL screen and saves the image data to a buffer in SPIRAM. * It then sends the image buffer to a server and frees the allocated memory. * * @return * - ESP_OK on success * - ESP_FAIL if memory allocation or screenshot capture fails * * @note * - The function uses LVGL's `lv_snapshot_take_to_buf` to capture the screen content and * `send_screenshot_to_server` to send the data to an HTTP server. * - Screen width and height are retrieved dynamically based on the active screen. */ esp_err_t make_screenshot() { lv_obj_t * screen = lv_scr_act(); lv_img_dsc_t snapshot; uint32_t width = lv_obj_get_width(screen); uint32_t height = lv_obj_get_height(screen); uint32_t data_size = width * height * sizeof(lv_color_t); // Allocate buffer for the image data in SPIRAM uint8_t *img_data = (uint8_t *)heap_caps_malloc(data_size, MALLOC_CAP_32BIT | MALLOC_CAP_SPIRAM); if (img_data == NULL) { ESP_LOGE(TAG, "Fehler beim Allozieren des Datenbuffers"); return ESP_FAIL; } snapshot.data = img_data; // Assign the allocated buffer to snapshot.data // Write screenshot to the buffer lv_res_t res = lv_snapshot_take_to_buf(screen, LV_IMG_CF_TRUE_COLOR, &snapshot, (uint8_t *)snapshot.data, data_size); if (res != LV_RES_OK) { ESP_LOGE(TAG, "Fehler beim Erstellen des Screenshots"); heap_caps_free(img_data); return ESP_FAIL; } // Write screenshot to server send_screenshot_to_server(&snapshot, width, height); // Send the snapshot directly via HTTP heap_caps_free(img_data); return ESP_OK; } /** * @brief Periodically captures and sends screenshots as part of a FreeRTOS task. * * This task waits for an initial delay before starting to capture screenshots at a regular interval. * It uses the `make_screenshot` function to capture the current screen and send it to a server. * * @param pvParameter Pointer to a `screenshot_task_params_t` structure containing the task parameters. * The structure should include: * - `initial_delay`: Initial delay in seconds before the first screenshot capture. * - `task_delay`: Delay in seconds between subsequent screenshot captures. * * @note * - The `screenshot_task_params_t` structure must be defined and initialized by the caller. * - Ensure sufficient memory and network availability for screenshot capture and transmission. * - The task runs indefinitely with a delay between captures. * * Example: * @code{c} * screenshot_task_params_t params = { * .initial_delay = 5, // 5 seconds delay before first screenshot * .task_delay = 60 // 60 seconds between each screenshot * }; * xTaskCreate(&screenshot_task, "screenshot_task", 4096, ¶ms, 5, NULL); * @endcode */ void screenshot_task(void *pvParameter){ ESP_LOGI(TAG, "Start Screenshot task"); screenshot_task_params_t *params = (screenshot_task_params_t *)pvParameter; vTaskDelay(pdMS_TO_TICKS(1000 * params->initial_delay)); for (;;) { make_screenshot(); vTaskDelay(pdMS_TO_TICKS(1000 * params->task_delay)); } } /** * @brief Initialize and start a task for periodic screenshot capturing and uploading. * * This function allocates memory for a `screenshot_task_params_t` structure, sets the * initial delay and task interval parameters, and starts the `screenshot_task` on the specified core. * * @param initial_delay Delay in seconds before the first screenshot is taken. * @param task_delay Delay in seconds between each subsequent screenshot capture. * * @note * - This function allocates memory for the parameters, so the caller should ensure * sufficient heap space is available. * - The task runs indefinitely, and the parameters are only set once upon initialization. * - This function pins `screenshot_task` to core 0. * * @return None * * Example: * @code{c} * start_screenshot(5, 60); // Starts screenshot task with 5 seconds initial delay and 60 seconds interval * @endcode */ void start_screenshot(uint32_t initial_delay, uint32_t task_delay) { // Allocate memory for the parameters struct screenshot_task_params_t *params = malloc(sizeof(screenshot_task_params_t)); // Assign the parameter values params->initial_delay = initial_delay; params->task_delay = task_delay; xTaskCreatePinnedToCore( screenshot_task, // Task function "Screeshot Task", // Task name 8000, // Stack size (bytes) params, // Task input parameter 16, // Task priority NULL, // Task handle 0 // Core to run the task on (0 or 1) ); }
Zuletzt das kleine PHP-Skript, das die Bilddaten empfängt. Es muss im htdocs Order der XAMPP Installation liegen.
<?php
// Directory to save uploaded files
$upload_dir = 'uploads/';

// Ensure the upload directory exists and is writable
if (!is_dir($upload_dir)) {
    mkdir($upload_dir, 0755, true); // Create the directory if it does not exist
}

// Generate a unique filename with a timestamp
$filename = $upload_dir . 'screenshot_' . date('Ymd_His') . '.bmp';

// Check if the HTTP POST body is not empty
if ($_SERVER['REQUEST_METHOD'] === 'POST' && !empty(file_get_contents("php://input"))) {
    // Open a file in write mode
    $file = fopen($filename, 'wb');
    if ($file) {
        // Write the HTTP POST data (binary image data) to the file
        $data = file_get_contents("php://input");
        fwrite($file, $data);
        fclose($file);
        echo "File uploaded successfully: " . $filename;
    } else {
        // Log an error if file couldn't be created
        http_response_code(500);
        echo "Failed to create file: Check directory permissions.";
    }
} else {
    // Log an error if no data was received
    http_response_code(400);
    echo "No data received.";
}
Im Code der Wetterstation findet man ein konkretes Beispiel, wie die Funktion verwendet wird. Damit war es mir jetzt möglich, ohne großen Aufwand viele Screenshots für meinen Artikel über die Wetterstation zu erstellen ohne ständig die SD-Karte ein- und ausbauen zu müssen.
Falls ihr noch weitere Ideen habt, wie man das Tool noch nützlicher machen kann, lasst es mich gerne wissen.
